# Header
#### How to Edit the Header Using Elementor
{% hint style="success" %}
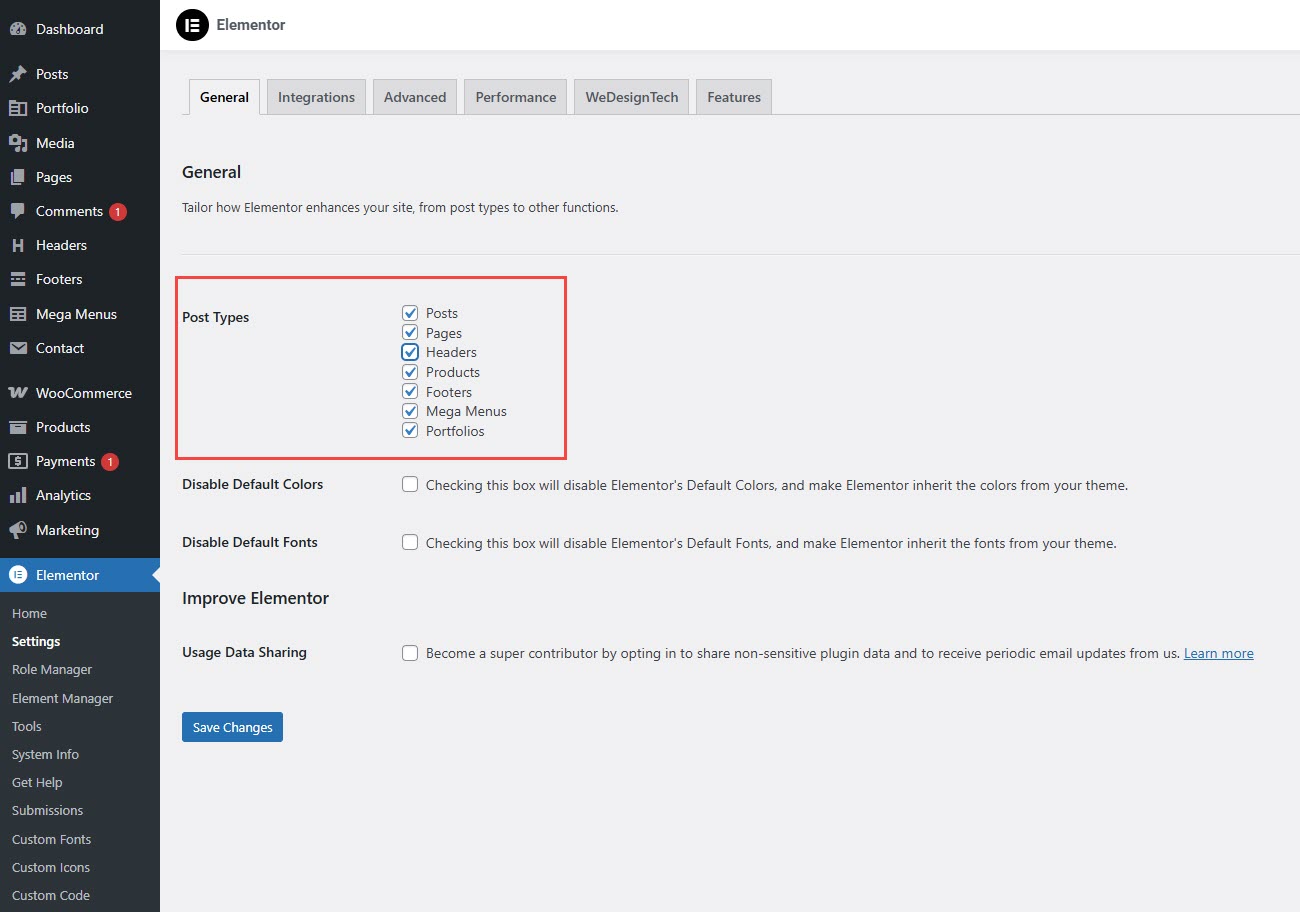
**To enable** header editing with Elementor, navigate to **WordPress Dashboard > Elementor > Settings > General > Post Types**. **Select all post types and click** **Save Changes**
{% endhint %}
### Create a New Header
**Step 1: Go to WordPress Dashboard** → Navigate to **Headers** → Click **Add New Header.**
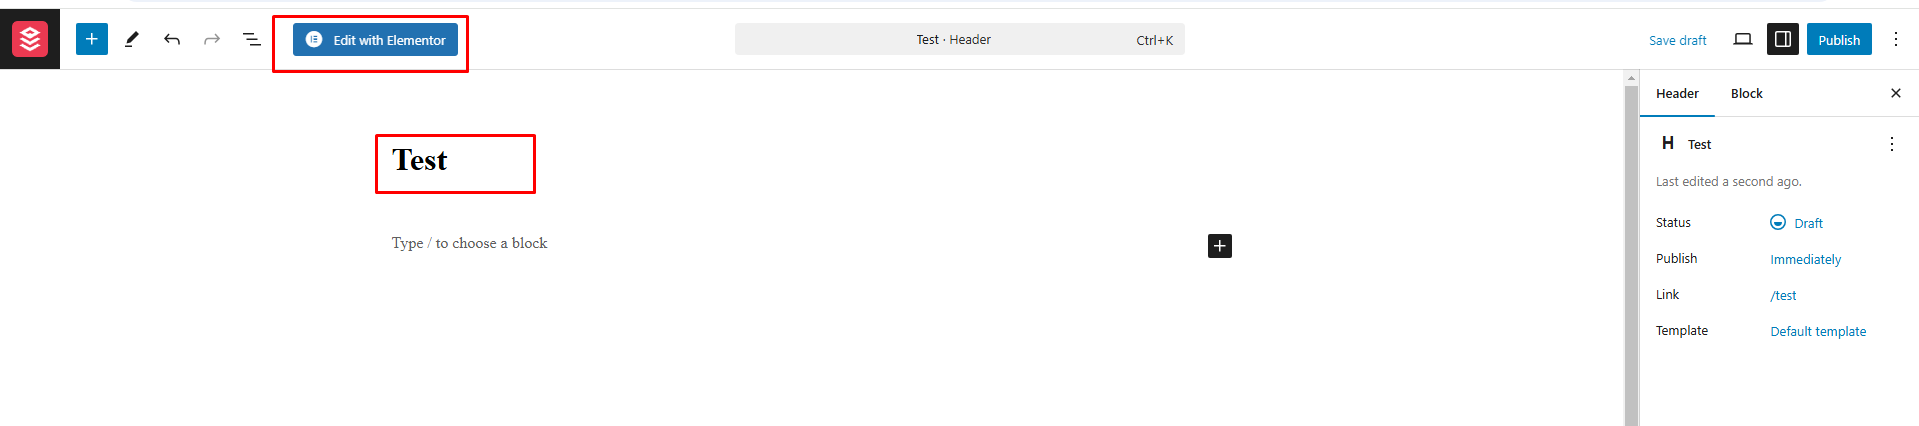
**Step 2:** Name your header template and click **Edit with Elementor**.
**Step 3:** Click **Edit with Elementor** and use Elementor’s layout options to design your header as desired
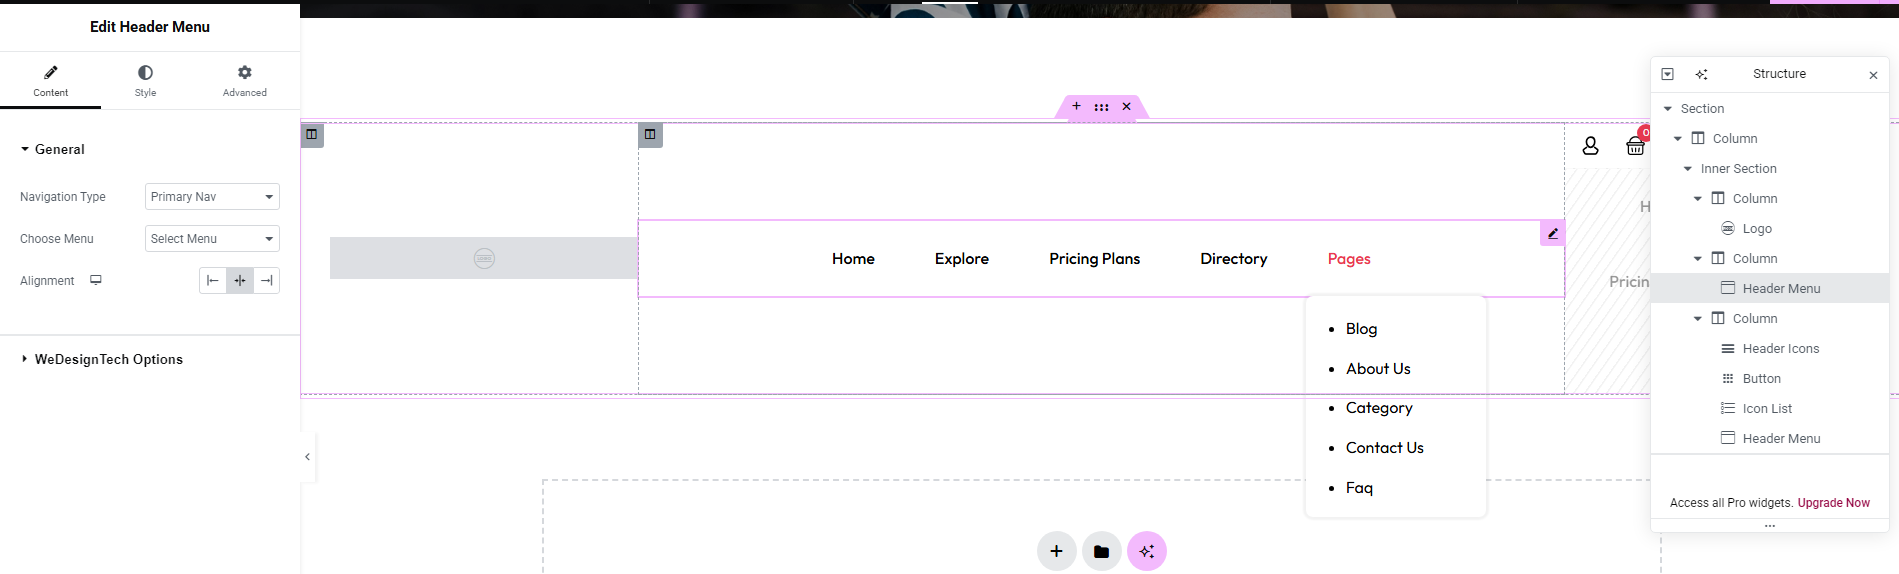
**Step 4:** Customize as needed — add logos, menus, and design elements that match your site’s branding
**Step 5 :** Save your changes and check the live preview to ensure everything looks perfect.
**Step 6:** After making all the changes, kindly click the **Publish** button to apply them.
#### **Edit a Predefined Header**
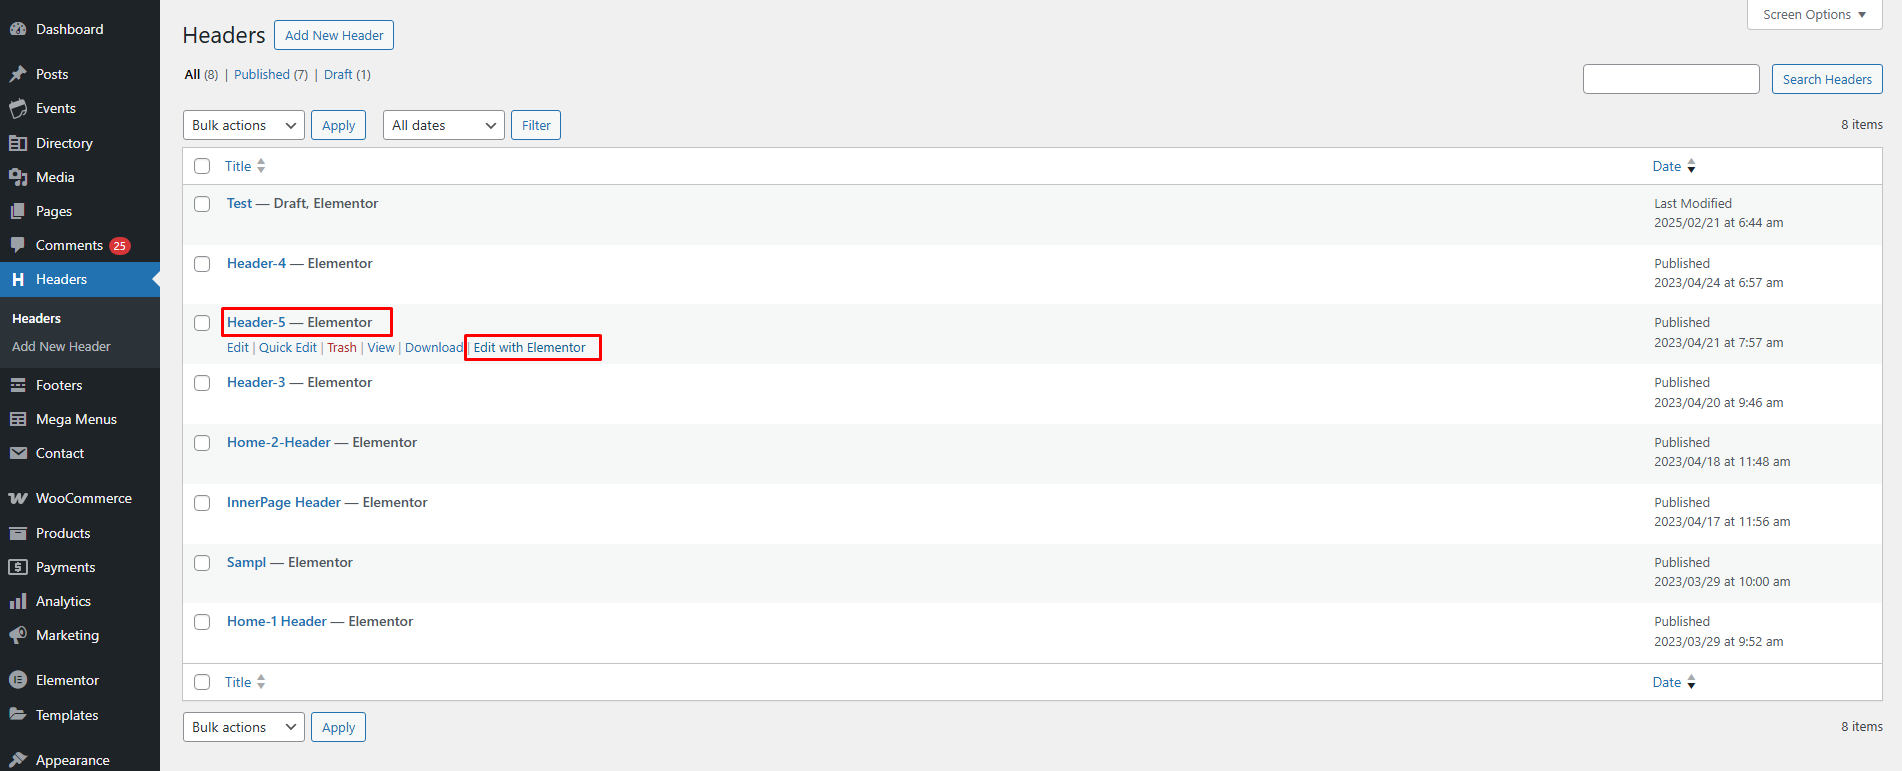
**Step 1: Go to WordPress Dashboard** → Navigate to **Headers** → **Headers**
**Step 2: Find & Select a Predefined Header** → Choose the header template you want to edit.
**Step 3 :** Click **Edit with Elementor** to open the Elementor editor.
**Step 4 : Modify the layout** – Adjust the header’s structure, add new sections, or edit existing ones.
**Customize elements** – Update the logo, change menu styles, tweak button designs, or edit the mobile header settings.
**Step 5:** Click the **Publish** button, then check the live preview to ensure everything appears as expected.
### **How to Add Your Header Layout to Your Site or Page**
#### **Option 1: Set Header via Customizer ( Global Header )**
**Steps to Set a Custom Header in WordPress**
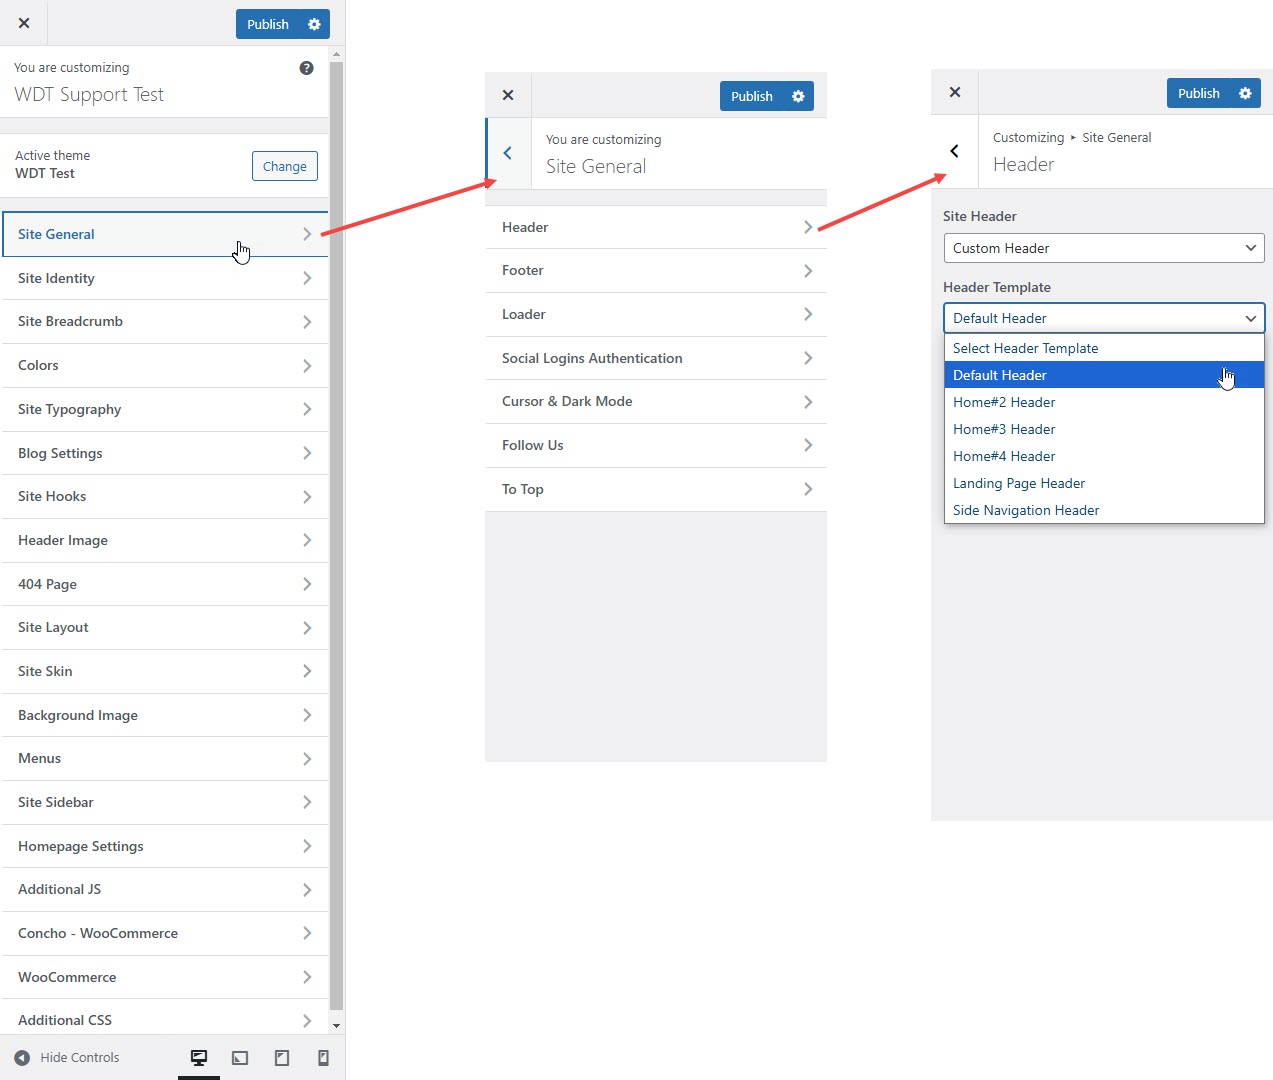
**Step 1:** Go to **WordPress Dashboard > Appearance > Customize > Site General**
**Step 2:** Click on **Header** → Then go to **Site Header**.
**Step 3:** Under **Custom Header**, enable or select **Choose Header Template**.
**Step 4:** From the dropdown list, select your preferred template (e.g., **Header 1**).
**Step 5:** Click the **Publish** button and check the frontend to ensure the header is applied correctly.
### **Option 2 : Set Header for Individual Pages**
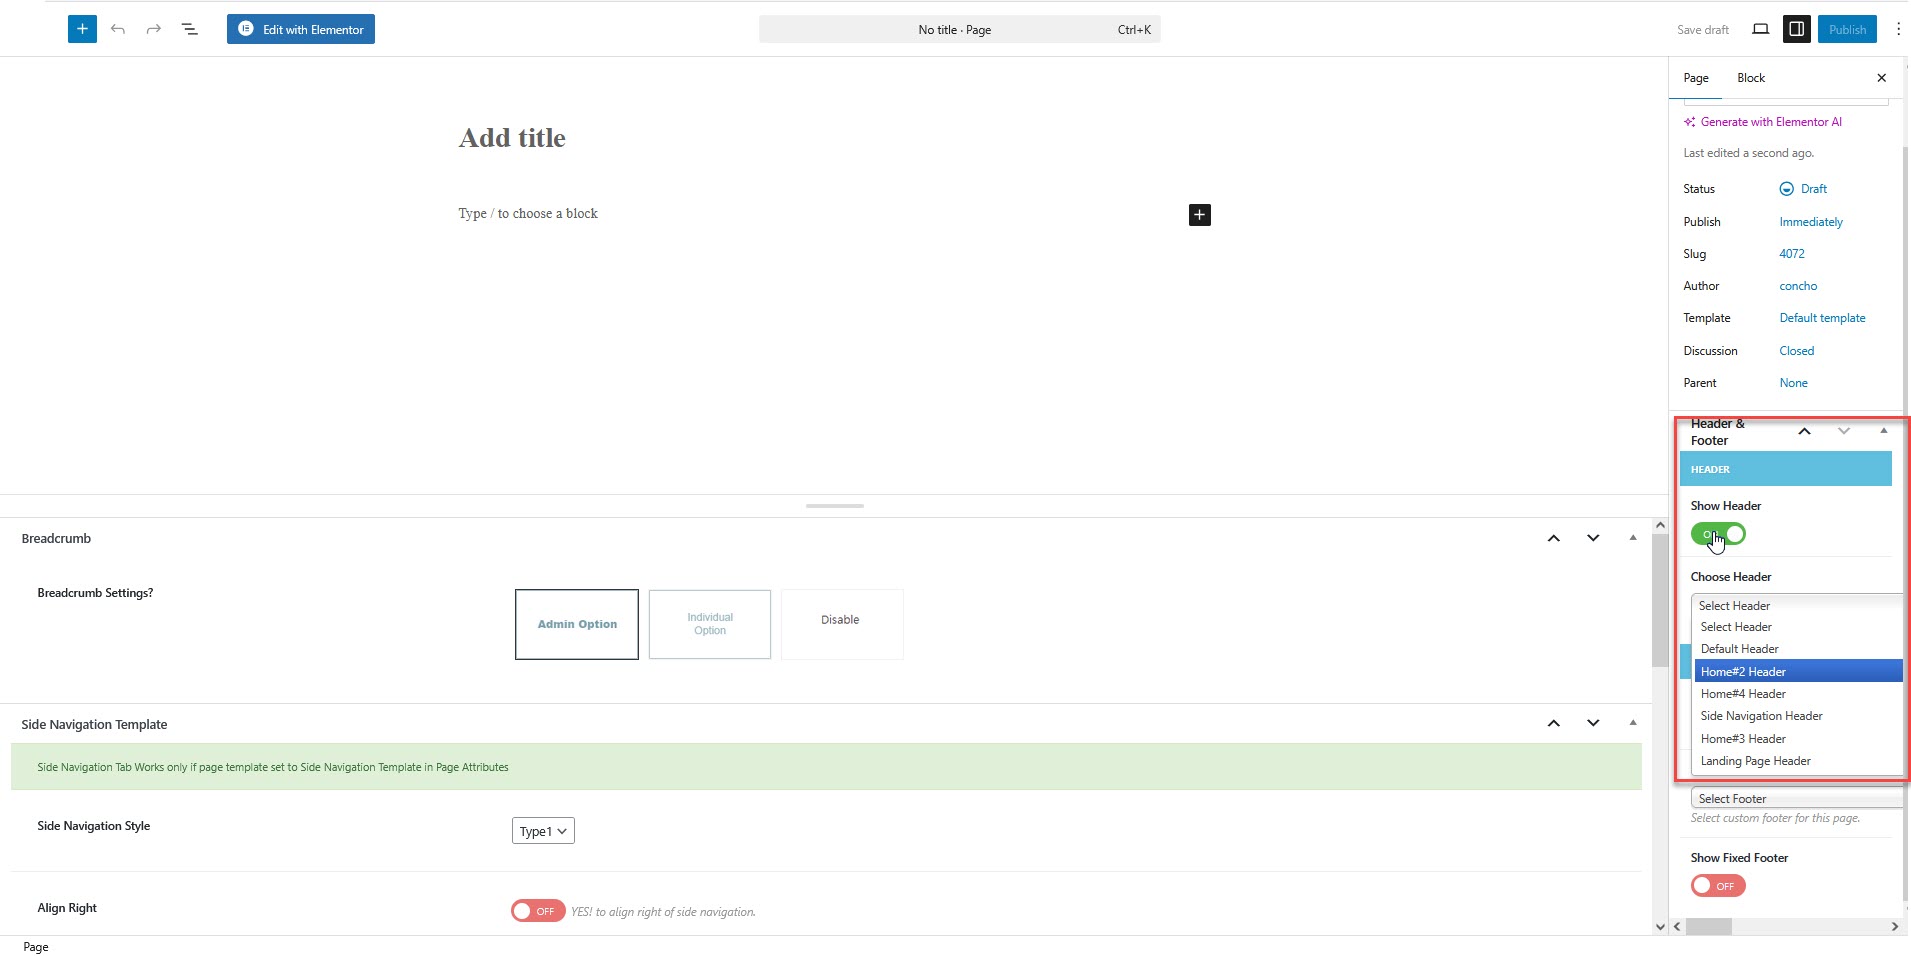
**Step 1 :** Navigate to **Dashboard > Pages**, select the page, click **Edit**, then go to **Page Options > Header**.
**Step 2 :** Select your **Header Style** for the specific page.
**Step 3 :** Click **“Publish”** to apply the changes.
{% embed url="" %}
#### **How to Add or Edit the Logo in WordPress**
#### **Option 1: Using WordPress Customizer**
* Go to **WordPress Dashboard** → **Appearance** → **Customize**.
* Navigate to **Site Identity → Site Logo.**
* Click **Select Logo** and upload your logo.
* Adjust the logo size if needed.
* Click the **Publish** button to save your changes.
#### **Option 2: Using Elementor**
* Go to **WordPress Dashboard > Header**, select the header, and click **Edit with Elementor**
* Click on the **Logo** element.
* Logo type > custom logo
* Upload a new logo or select an existing one from the media library.
* Adjust the **size, alignment, and styling** as needed.
* Click the **Publish** button to save your changes.